How to Get Custom Skins on Minecraft Windows 10 Edition
The Boss Update for Minecraft: Windows 10 brings you the ability to customize mob skins! Make your chickens look like horses, your villagers looks like carrots, and your creepers look like exploding phones — here's how to do it!
- How to show file extensions in Windows 10
- How to customize mob skins
- How to enable custom skins within Minecraft
How to show file extensions in Windows 10
Dealing with JSON files means you need to be able to see file extensions in Windows 10. Here's how to show them!
Shop Cyber Monday deals at: Amazon | Walmart | Best Buy | Microsoft | Dell
- Launch File Explorer from your Start menu, desktop, or taskbar.
- Click View. It is located near the top of the window.
-
Click the checkbox next to File name extensions.
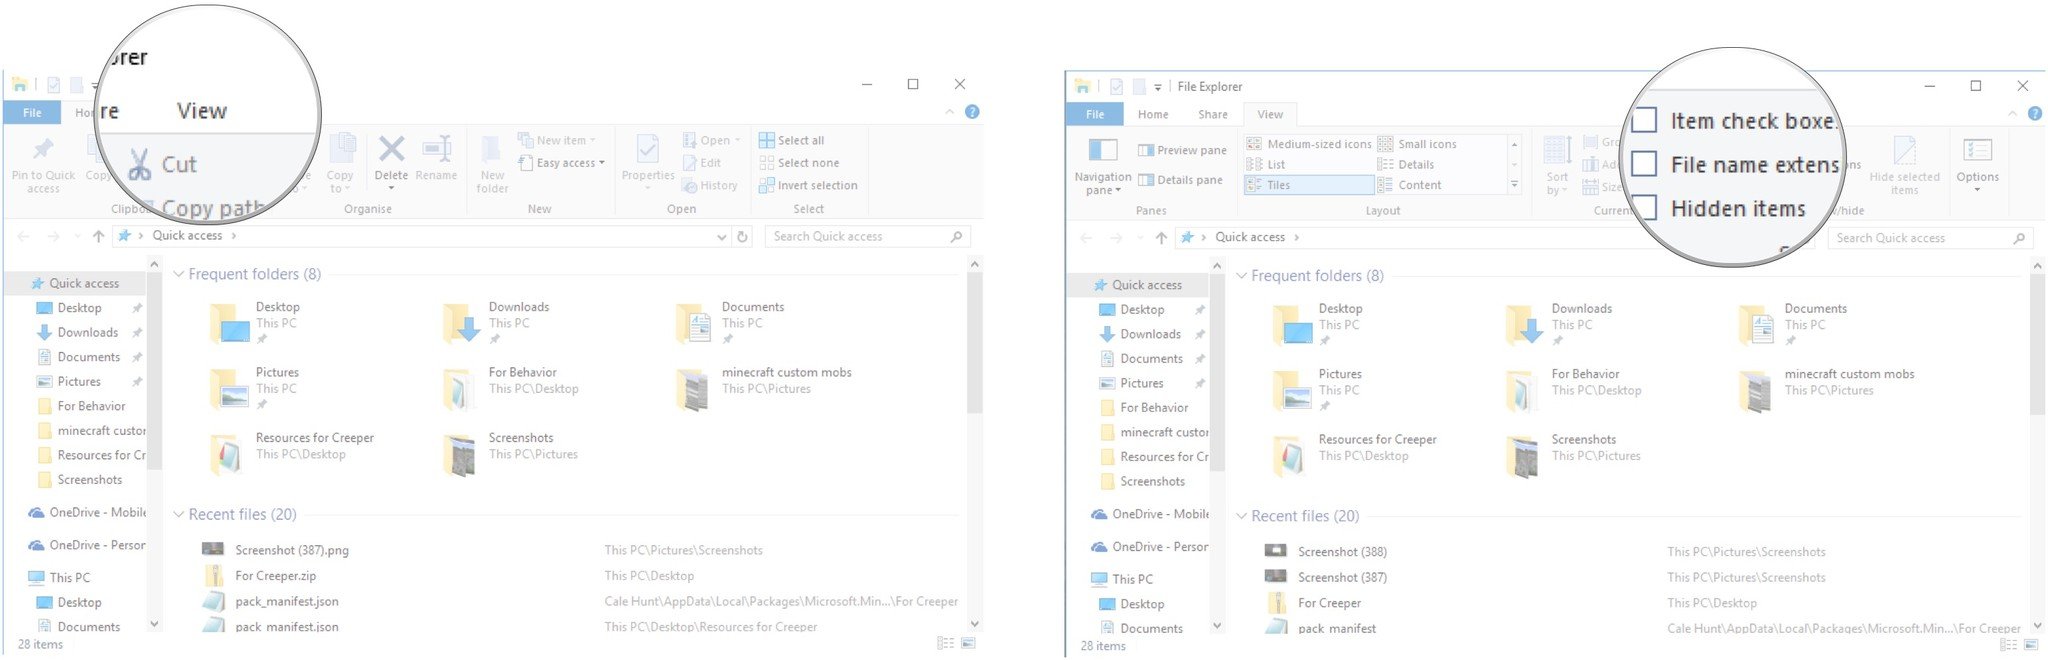

You'll now be able to see the extensions of files on your PC.
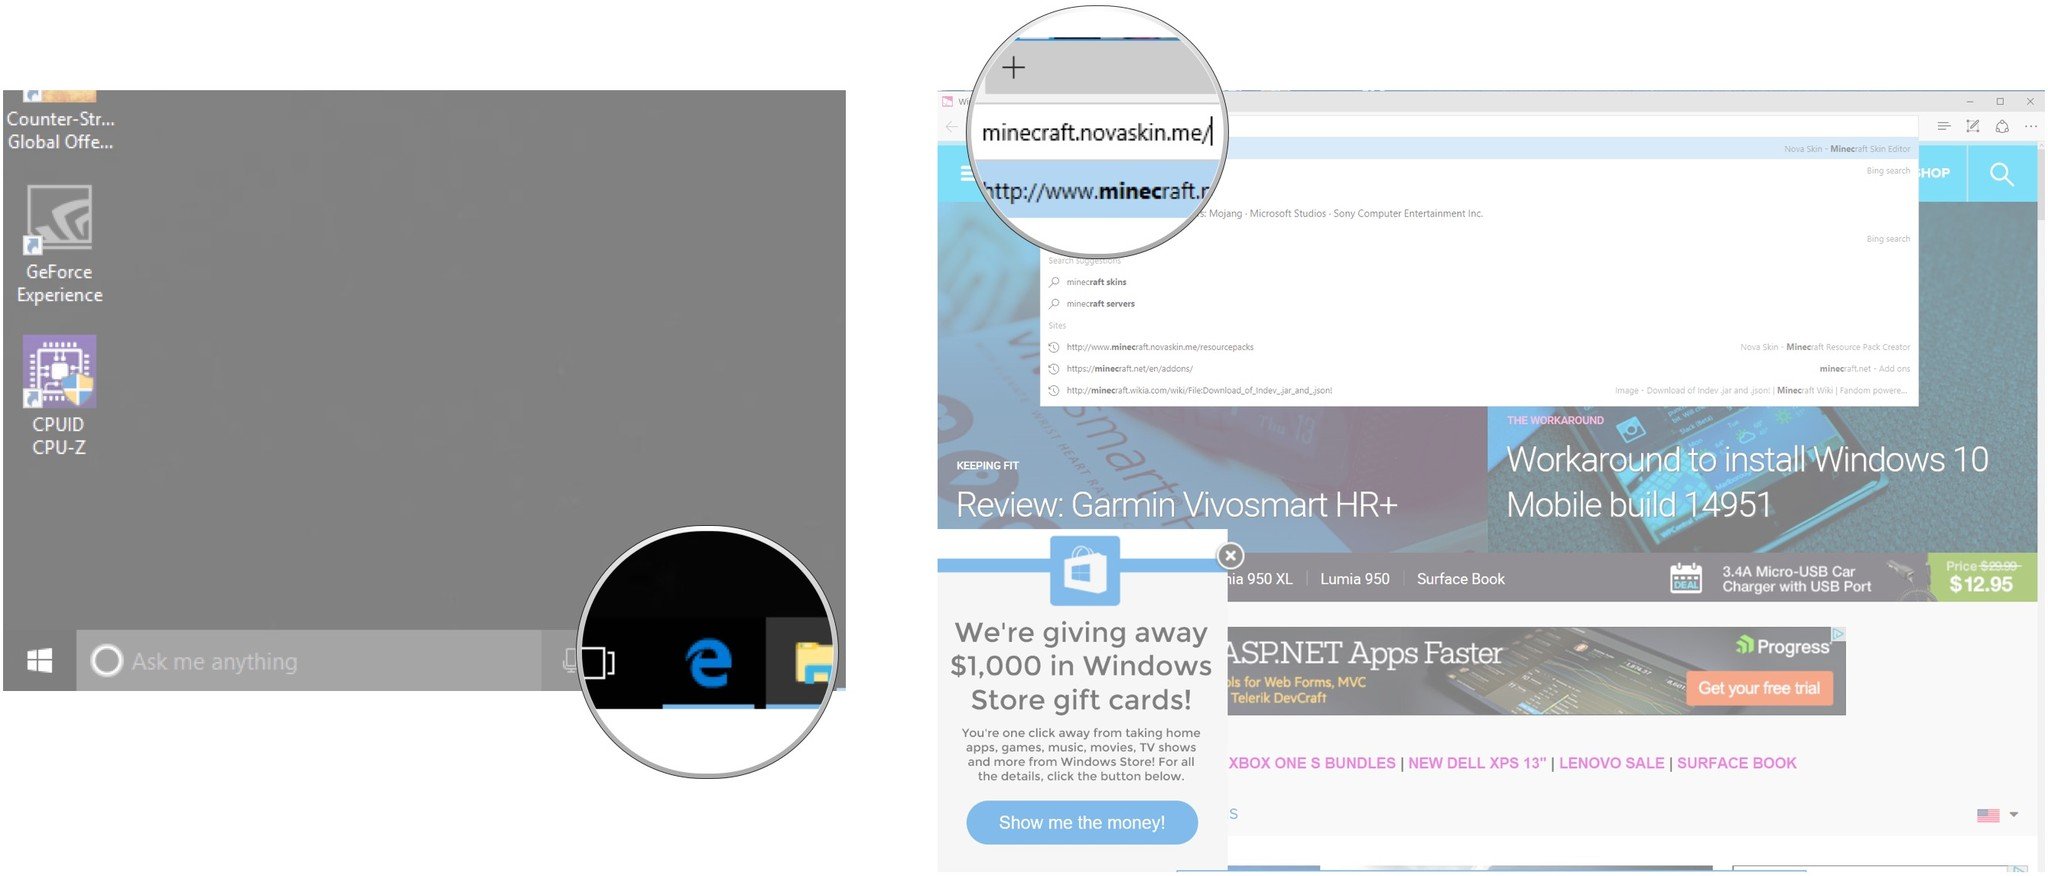
How to customize mob skins
- Launch your favorite web browser from the Start menu, taskbar, or desktop.
-
Navigate to minecraft.novaskin.me.
- Click Resourcepacks.
-
Click Entities.
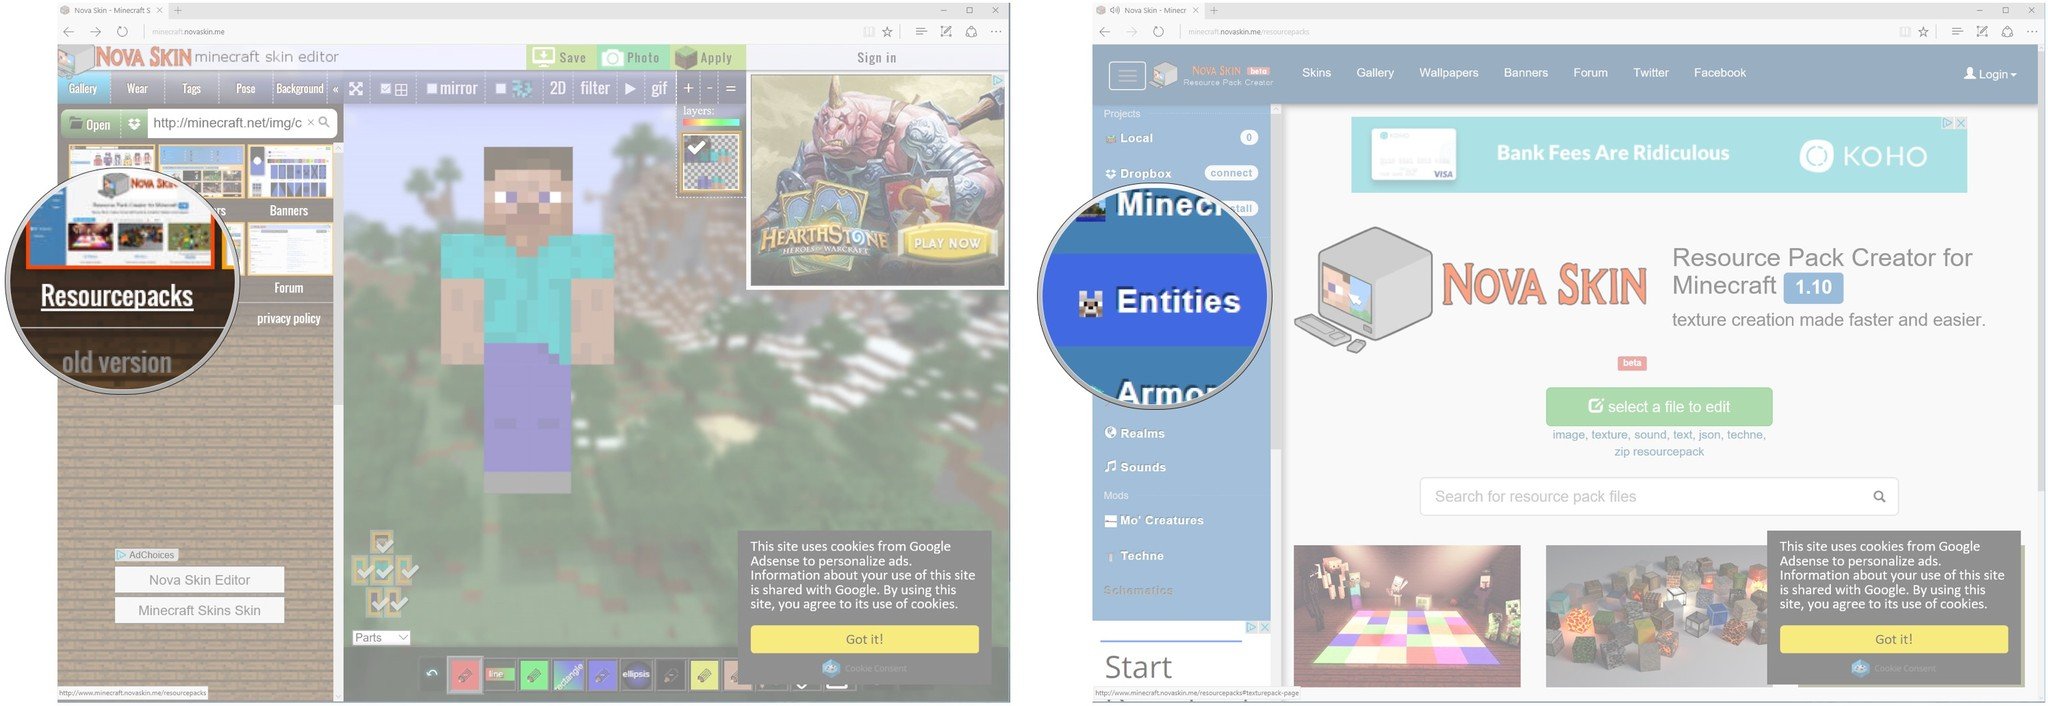
- Click an entity you want to customize. In this case we choose Creeper.
-
Click creeper.png.

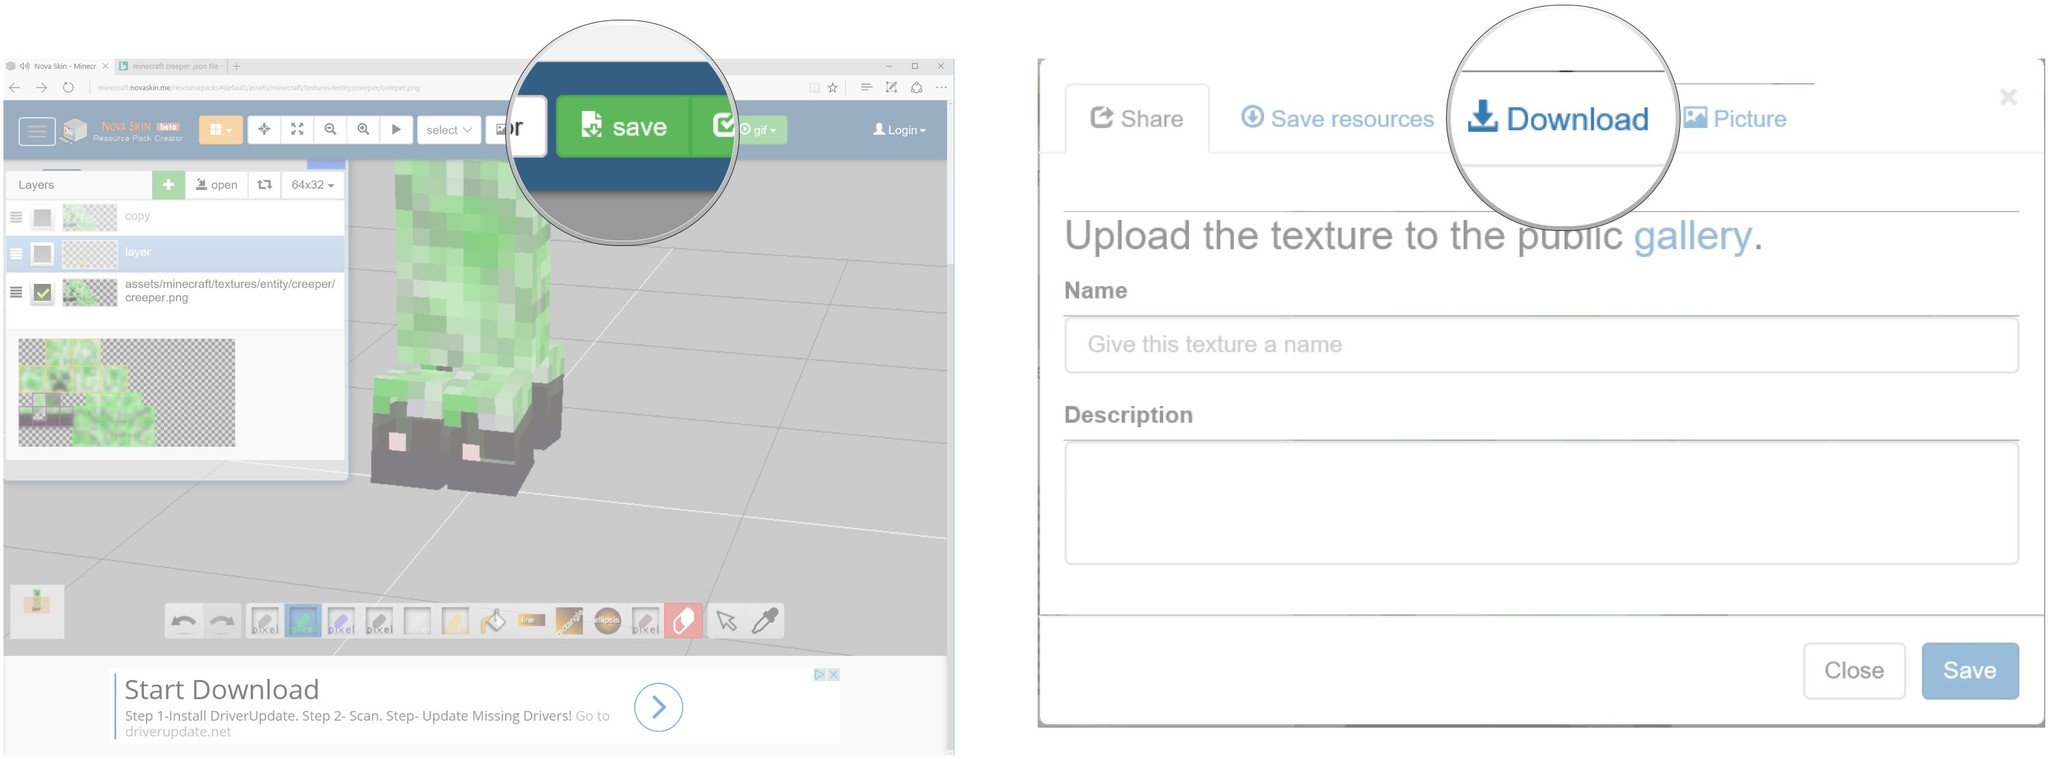
- Customize the entity using the site's editing tools.
- Click Save when you're finished.
-
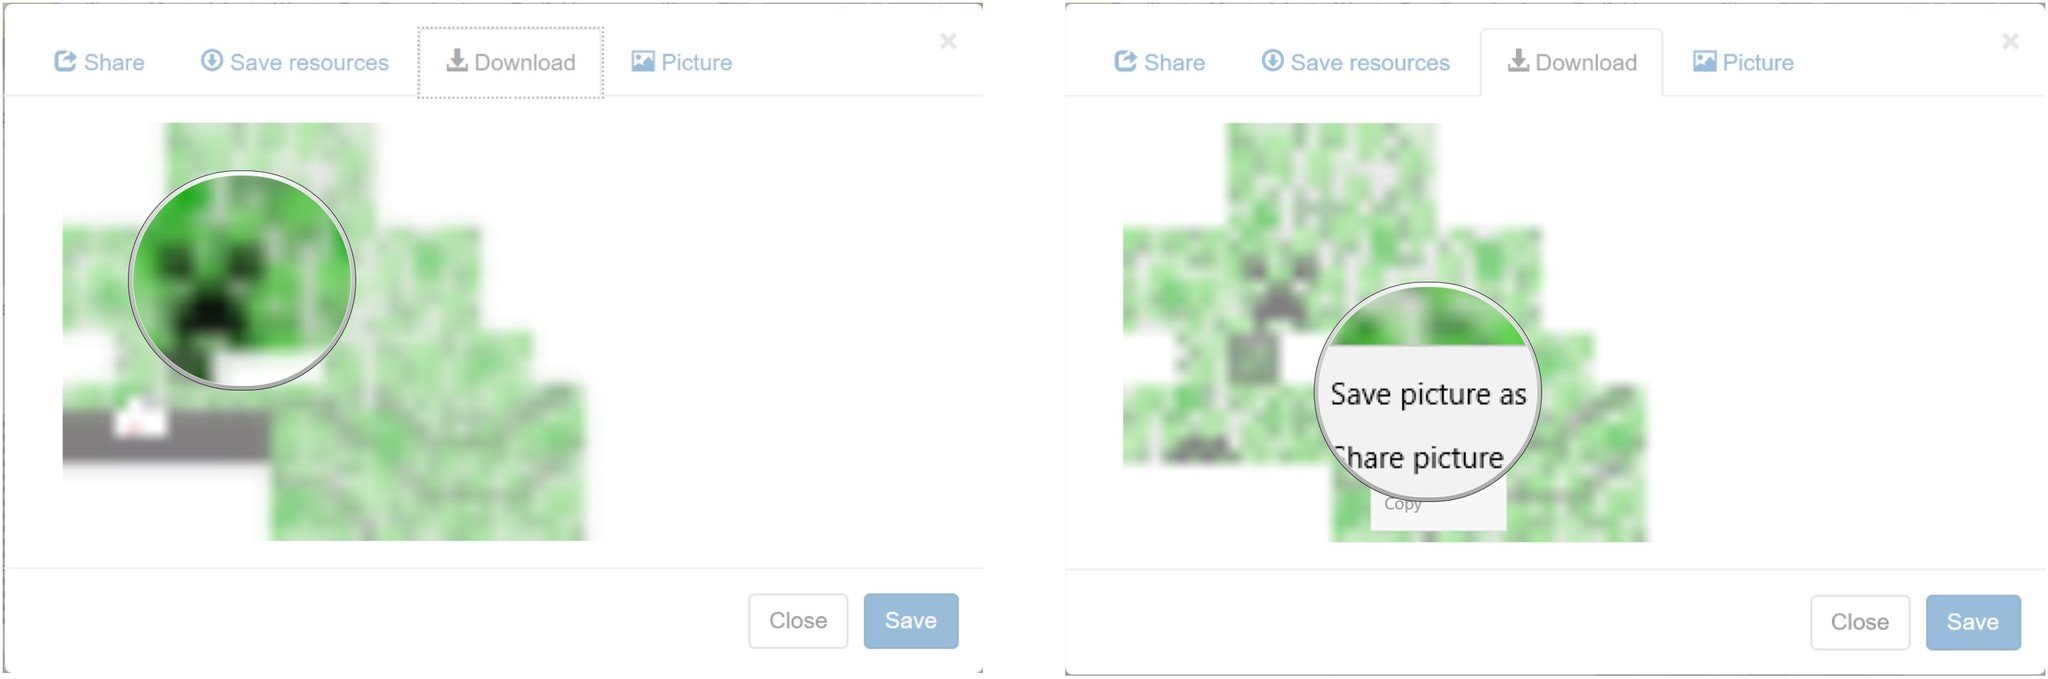
Click Download.
- Right-click the image.
-
Click Save picture as.
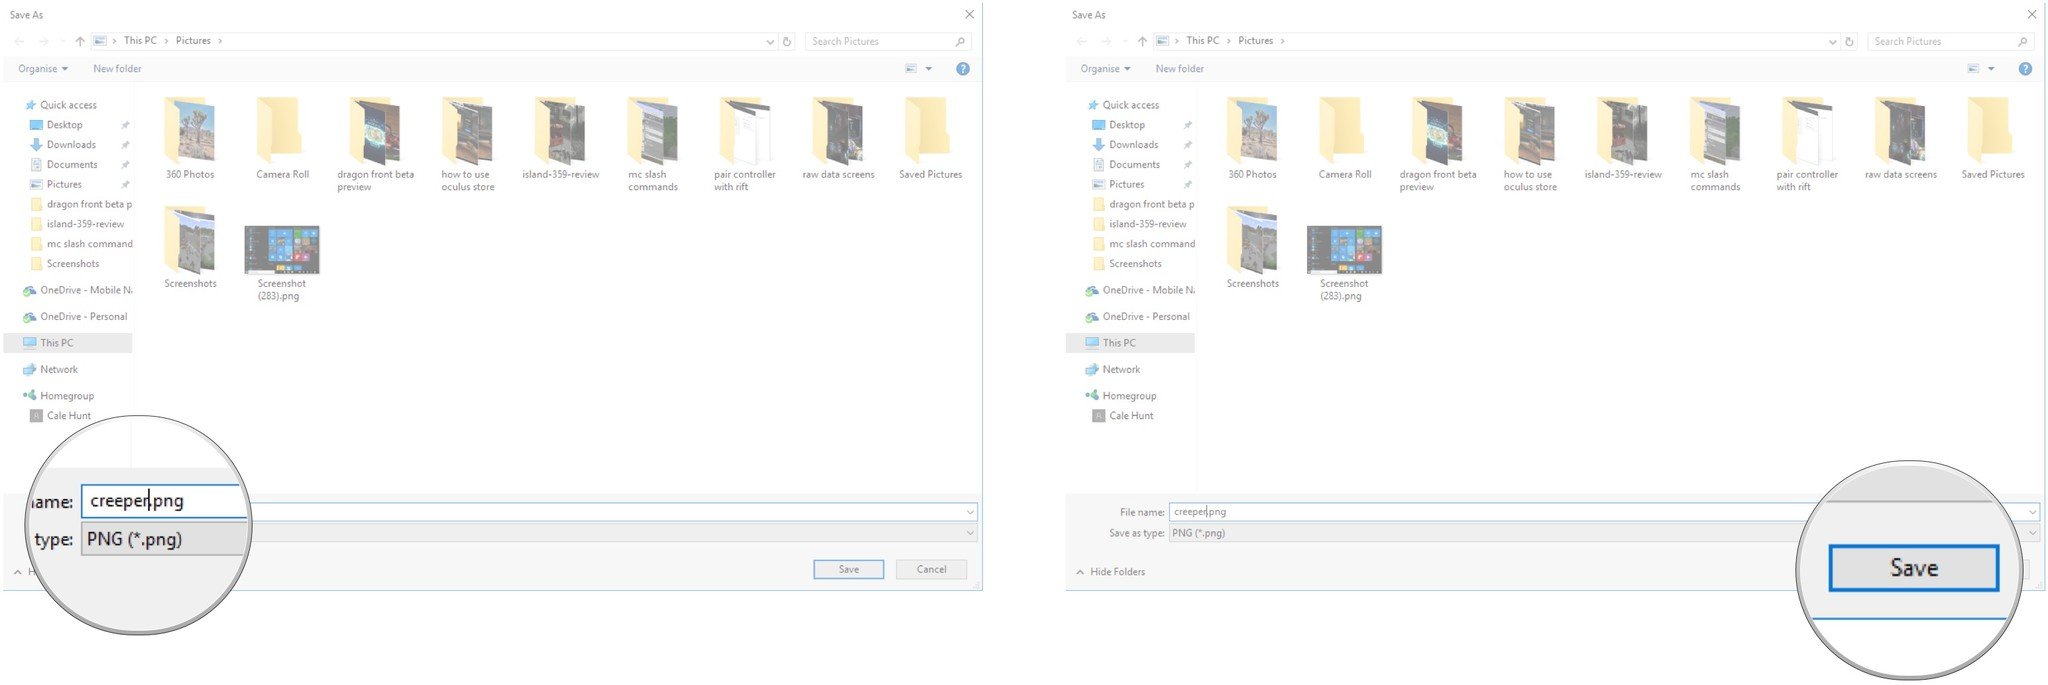
- Name the image creeper.png. Note that the file must be a PNG, and the name must line up with the EntityID as set by Minecraft.
-
Click Save.


You now have the PNG file saved, and it's time to add it to the Minecraft folder.
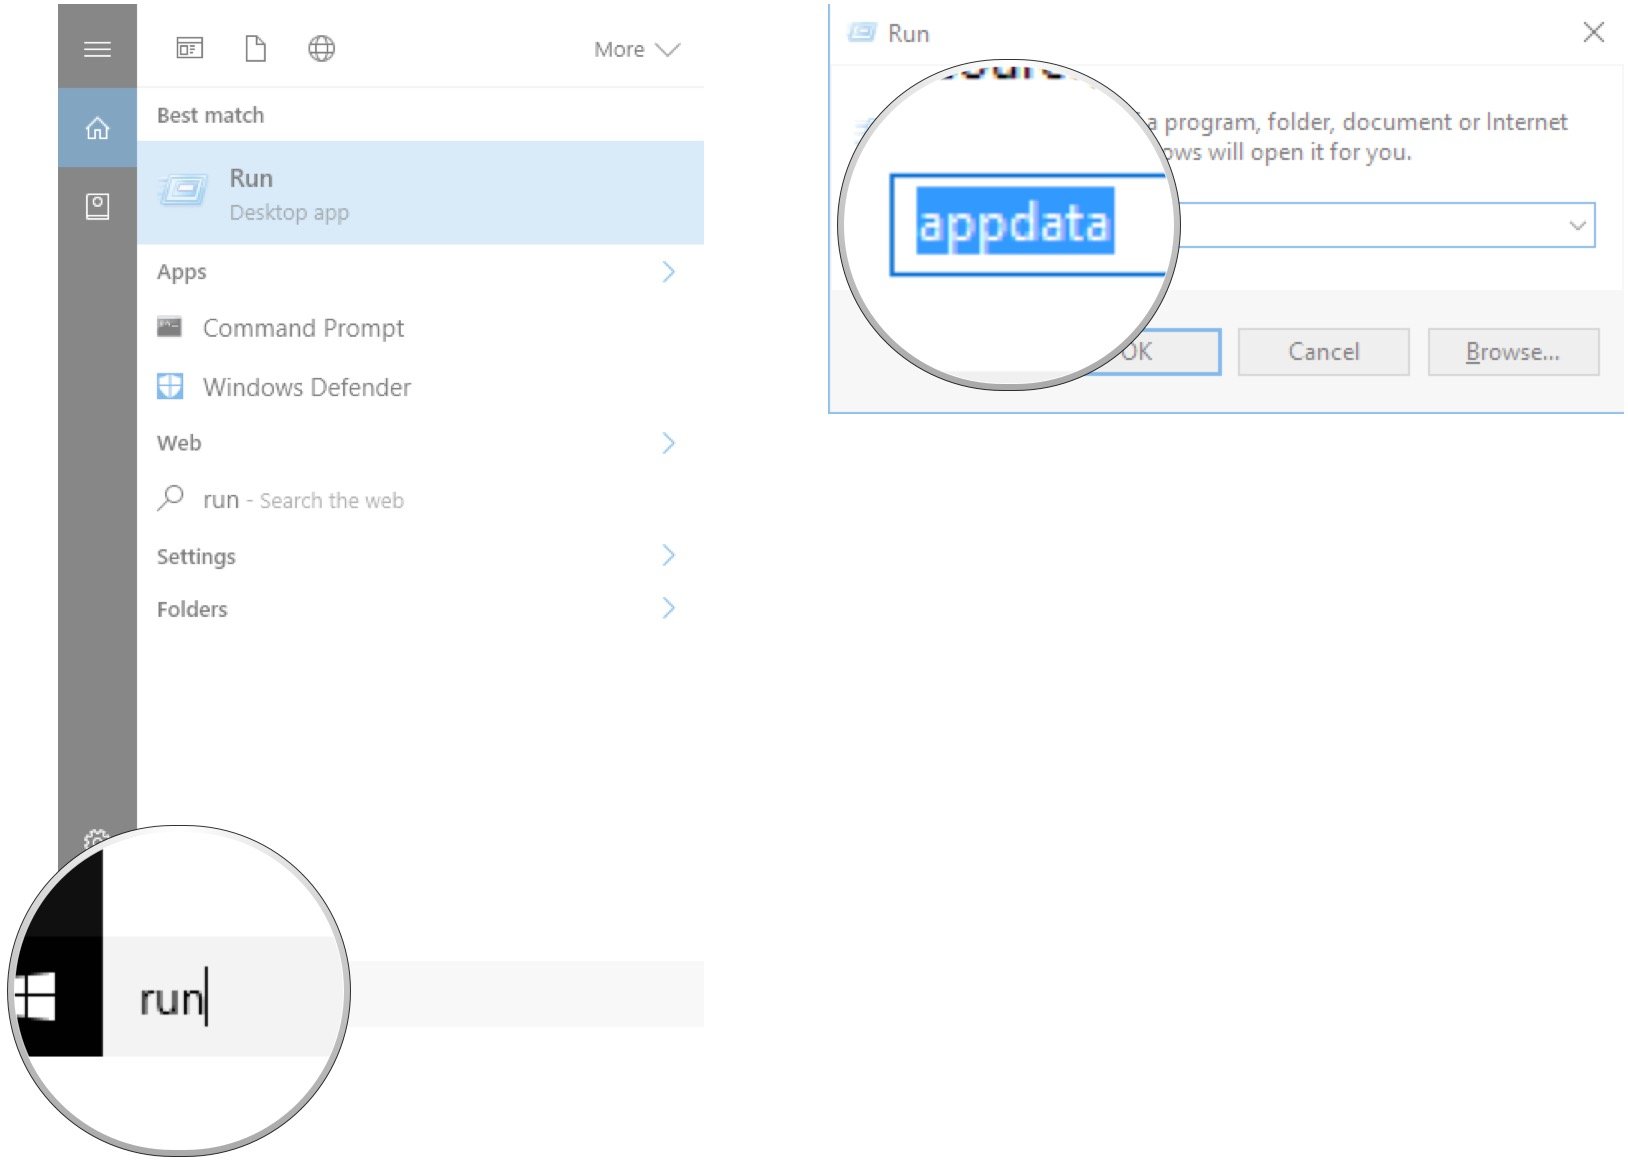
- Click the Search Windows / Cortana field.
- Type Run and hit Enter on your keyboard.
-
Type appdata and hit Enter on your keyboard.
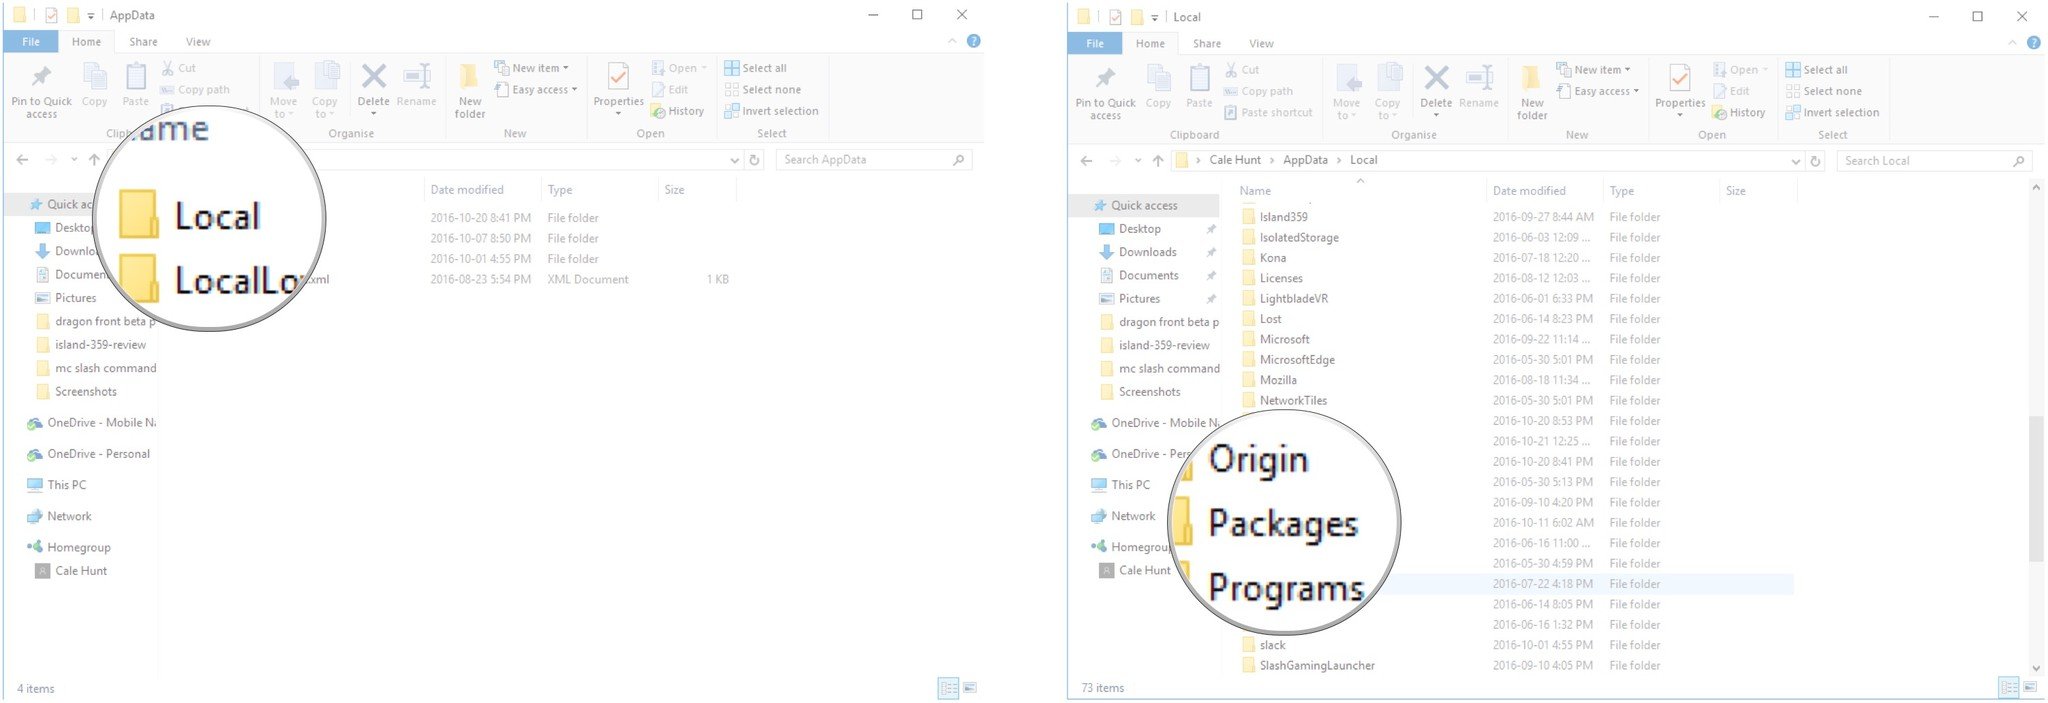
- Double-click the Local folder.
-
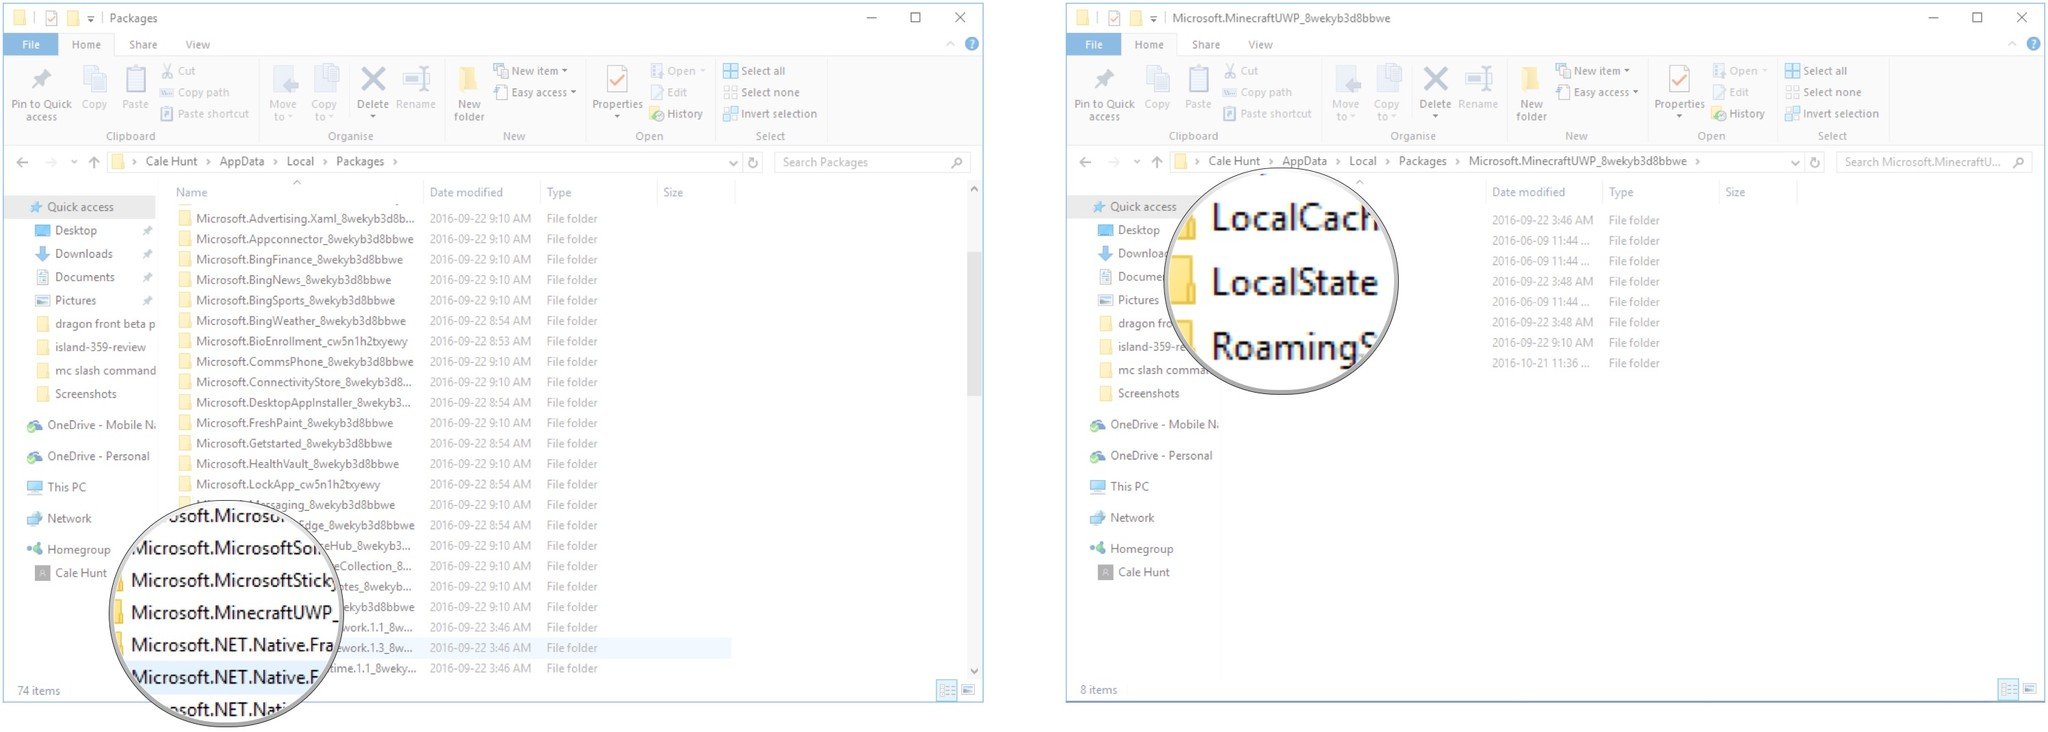
Double-click the Packages folder. You might have to scroll down a bit to find it.
- Double-click the Microsoft.MinecraftUWP folder. You might have to scroll down a bit to find it.
-
Double-click the LocalState folder.
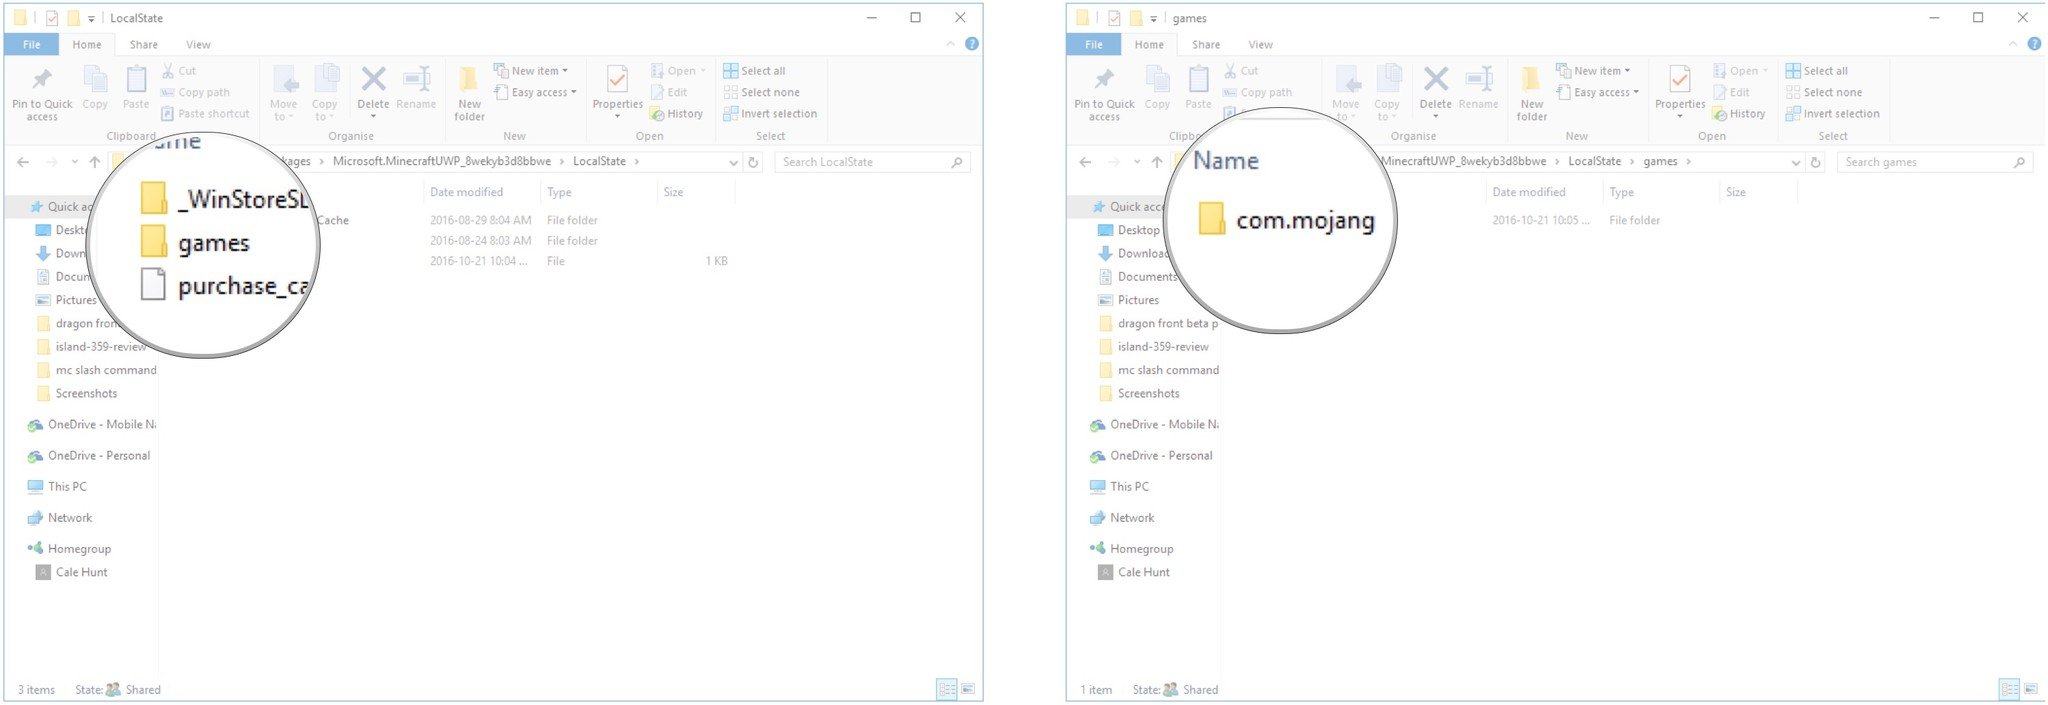
- Double-click the games folder.
-
Double-click the com.mojang folder.
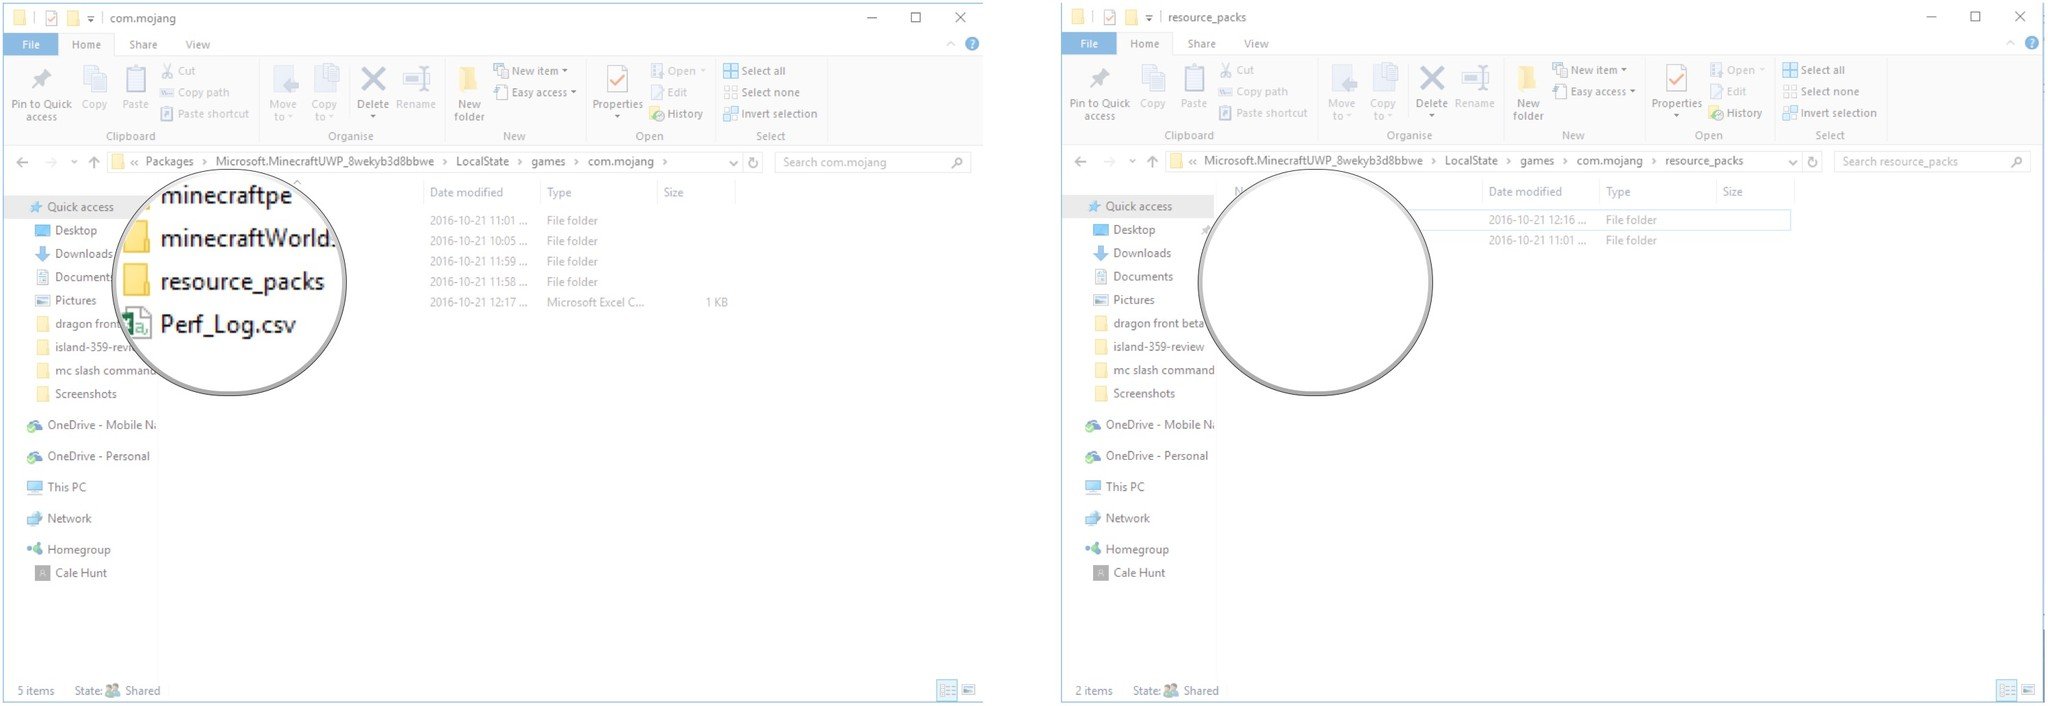
- Double-click the resource_packs folder.
-
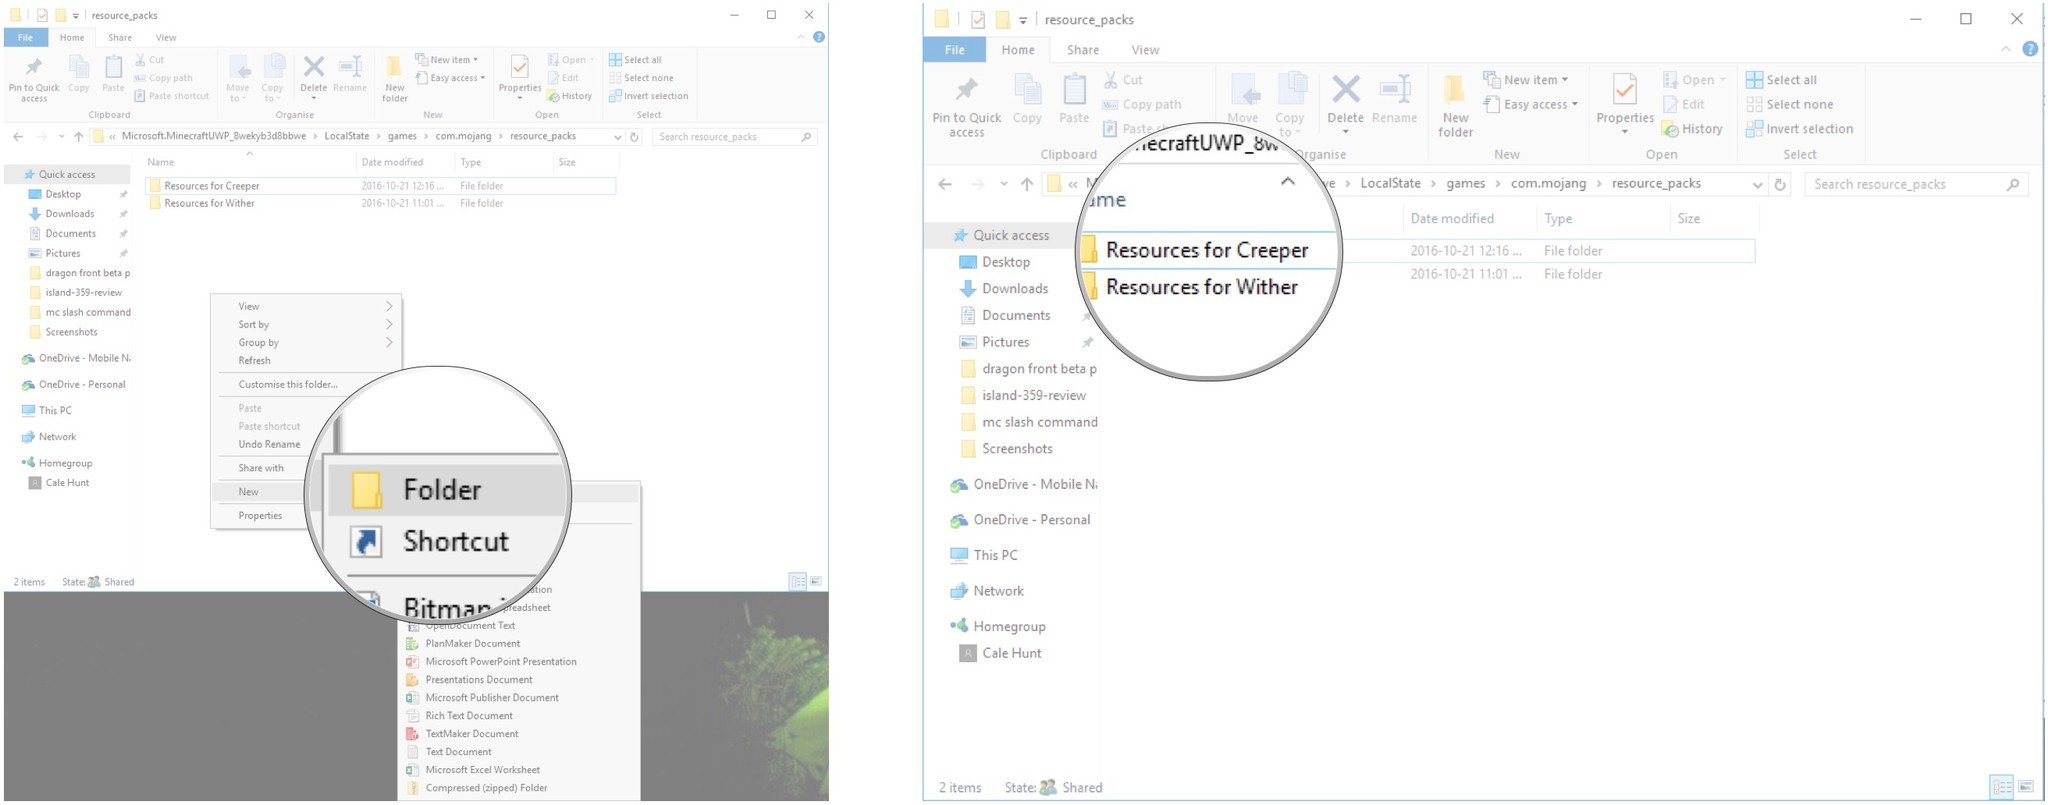
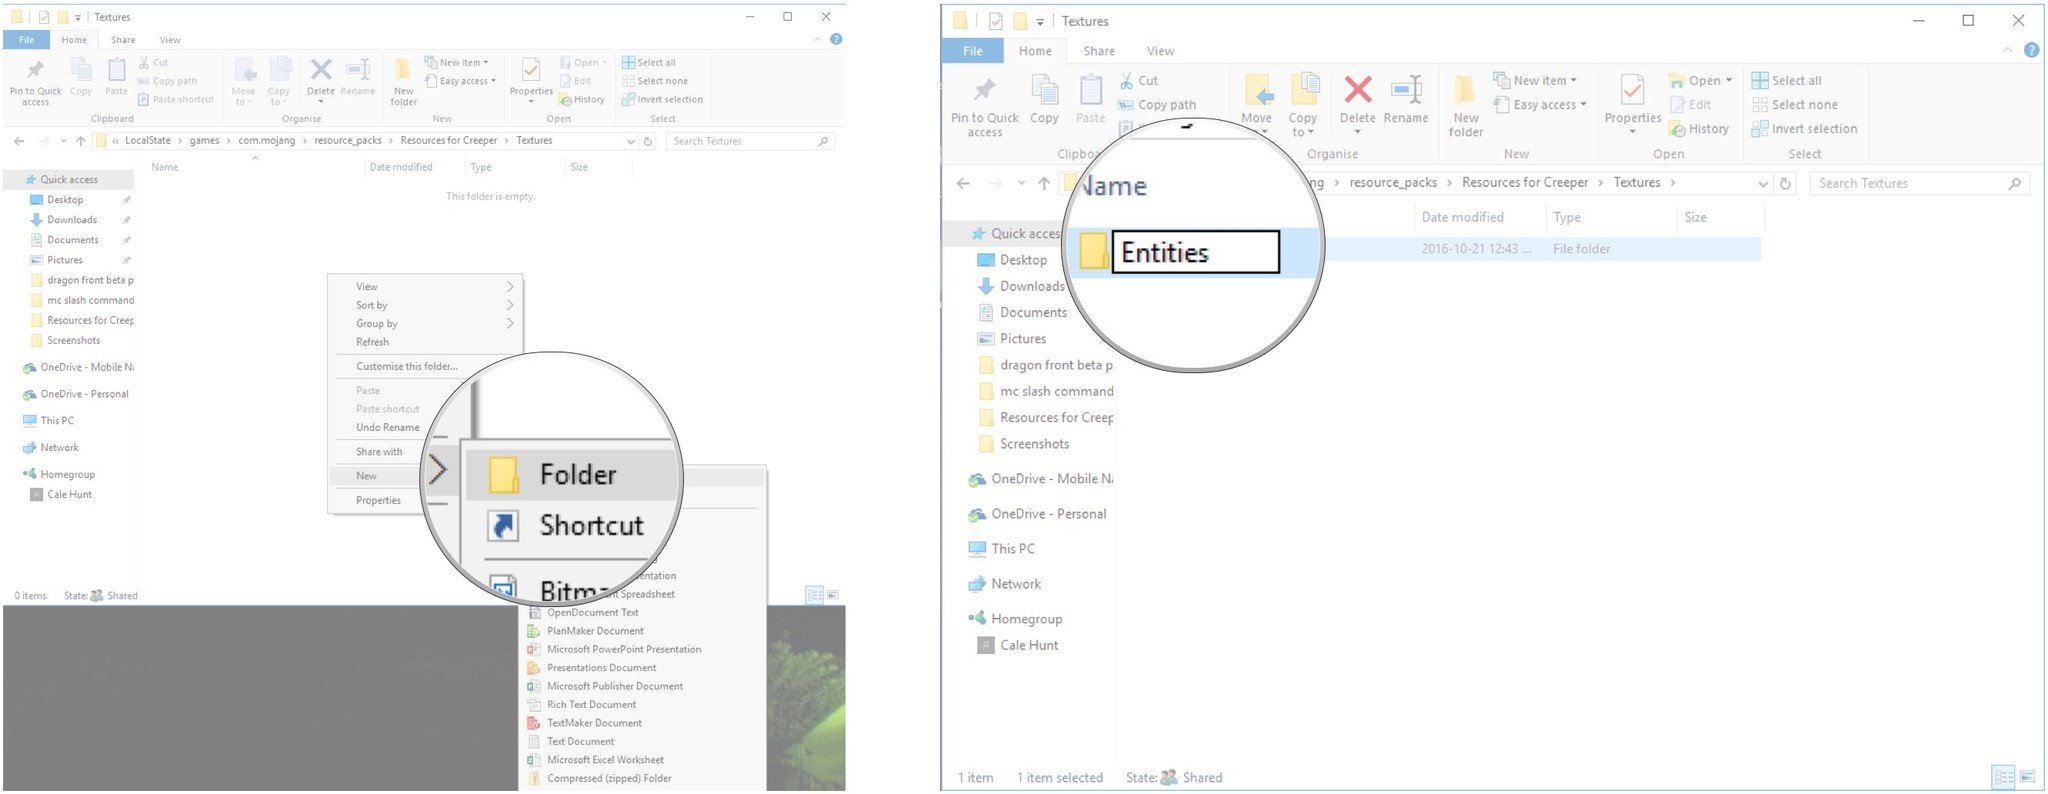
Right-click a blank space in the window.
- Hover your cursor over New and click Folder.
-
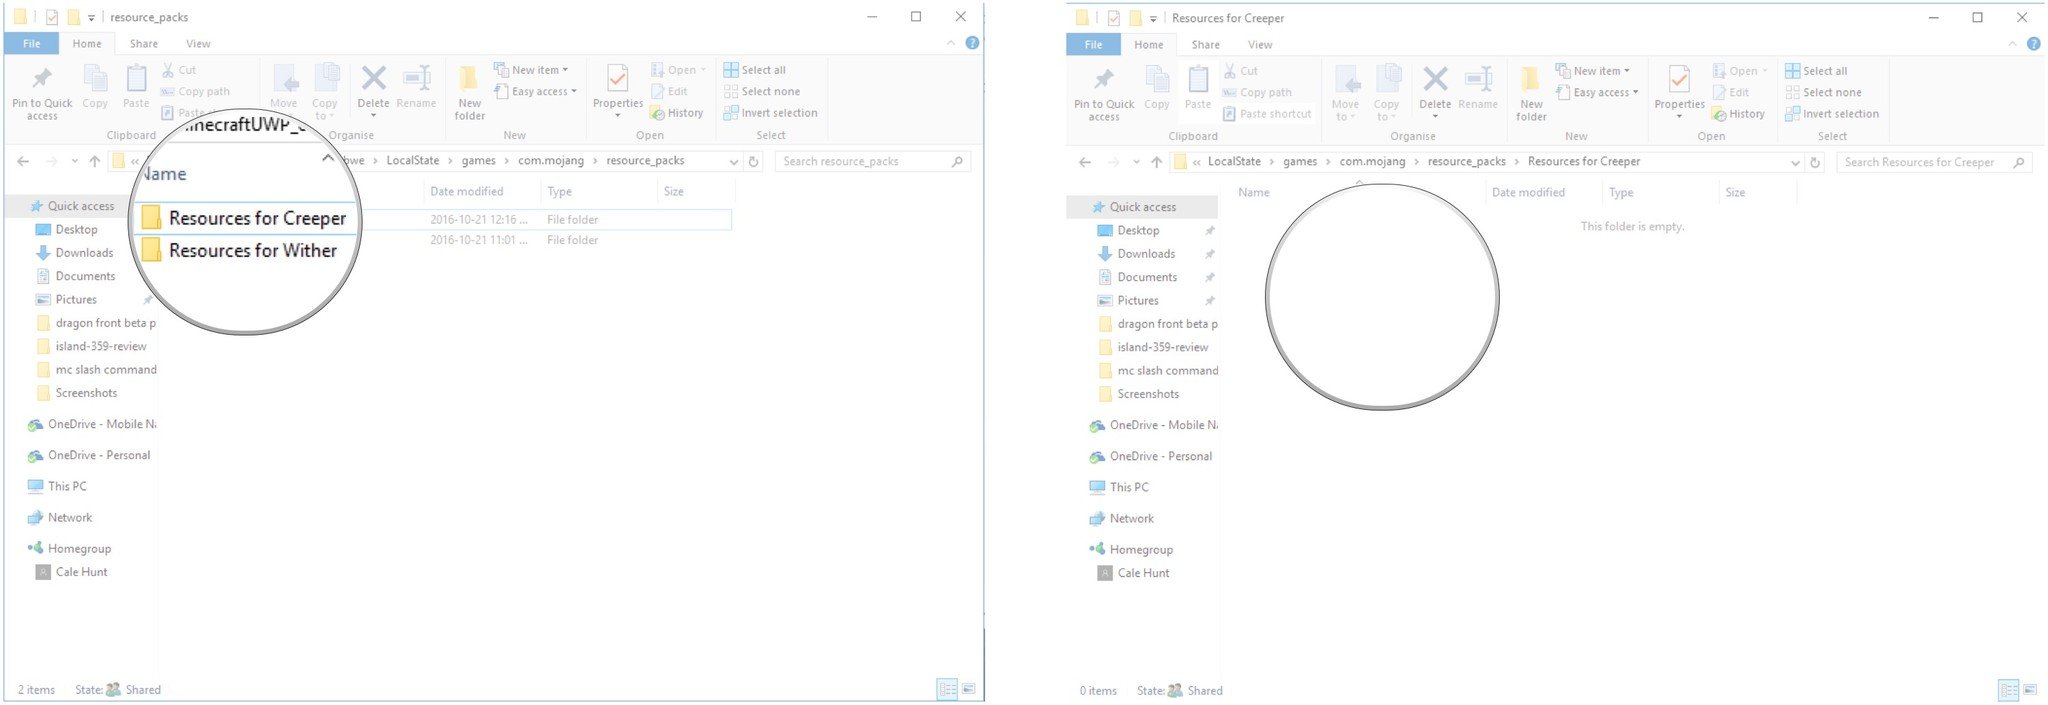
Type Resources for Creeper and hit Enter on your keyboard. You can name this folder appropriately for whatever entity you're customizing.
- Double-click the Resources for Creeper folder.
-
Right-click a blank space in the window.
- Hover your cursor over New and click Text Document.
-
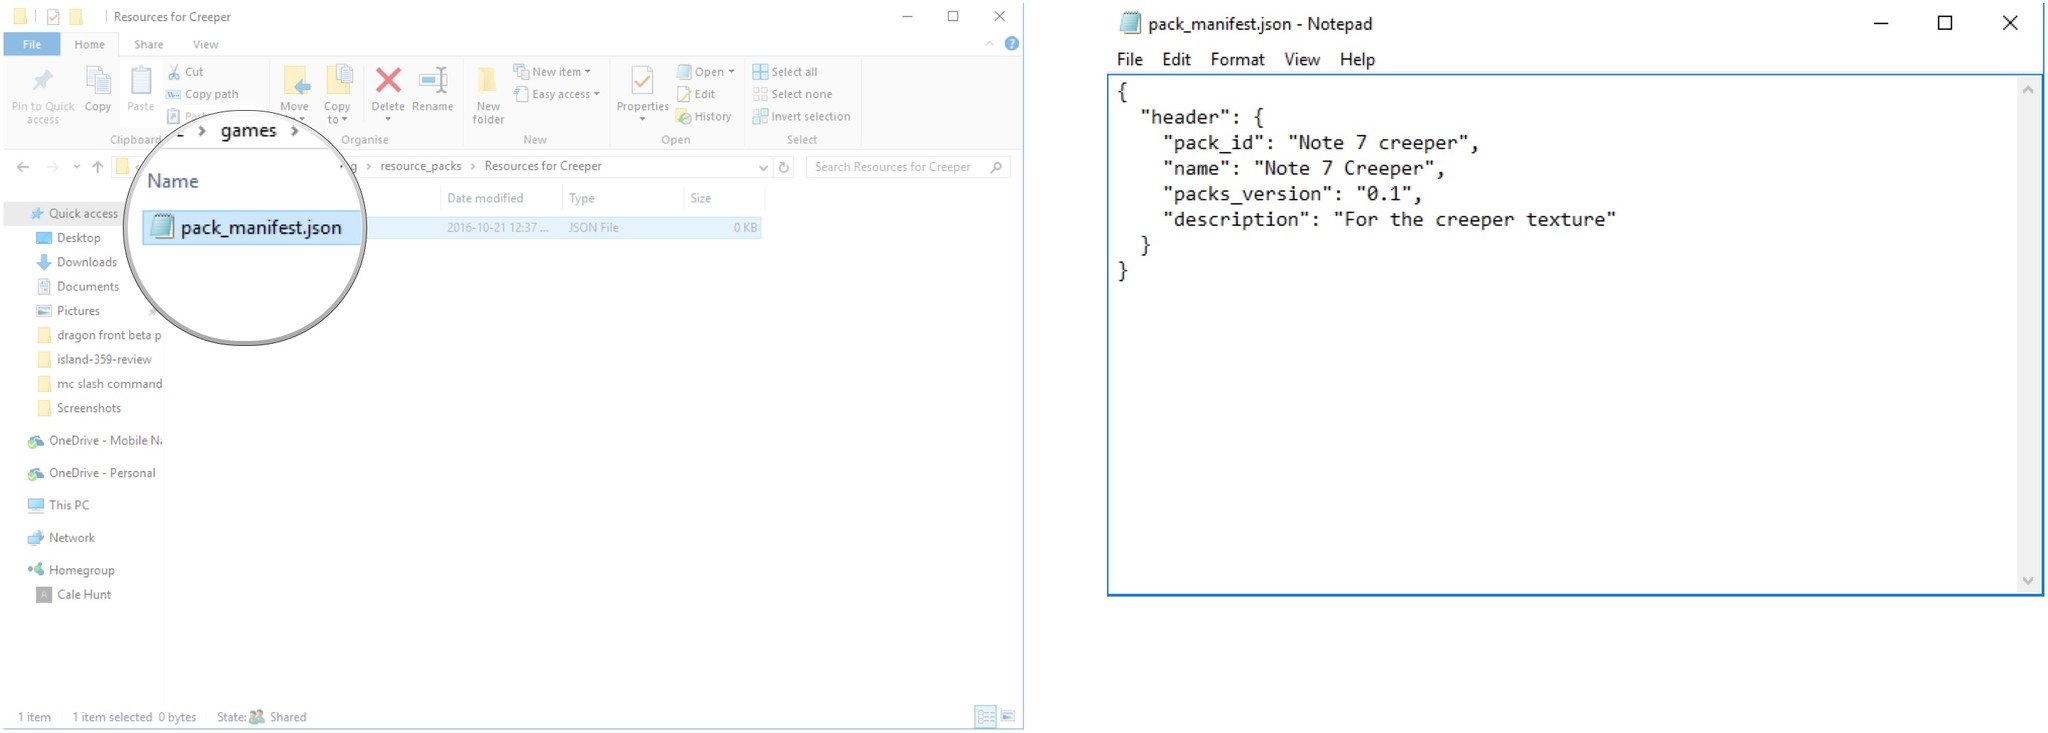
Type pack_manifest.json and hit Enter on your keyboard. Make sure you remove the original TXT filename.

- Double-click the pack_manifest JSON document.
-
Copy and paste this code into the JSON document:
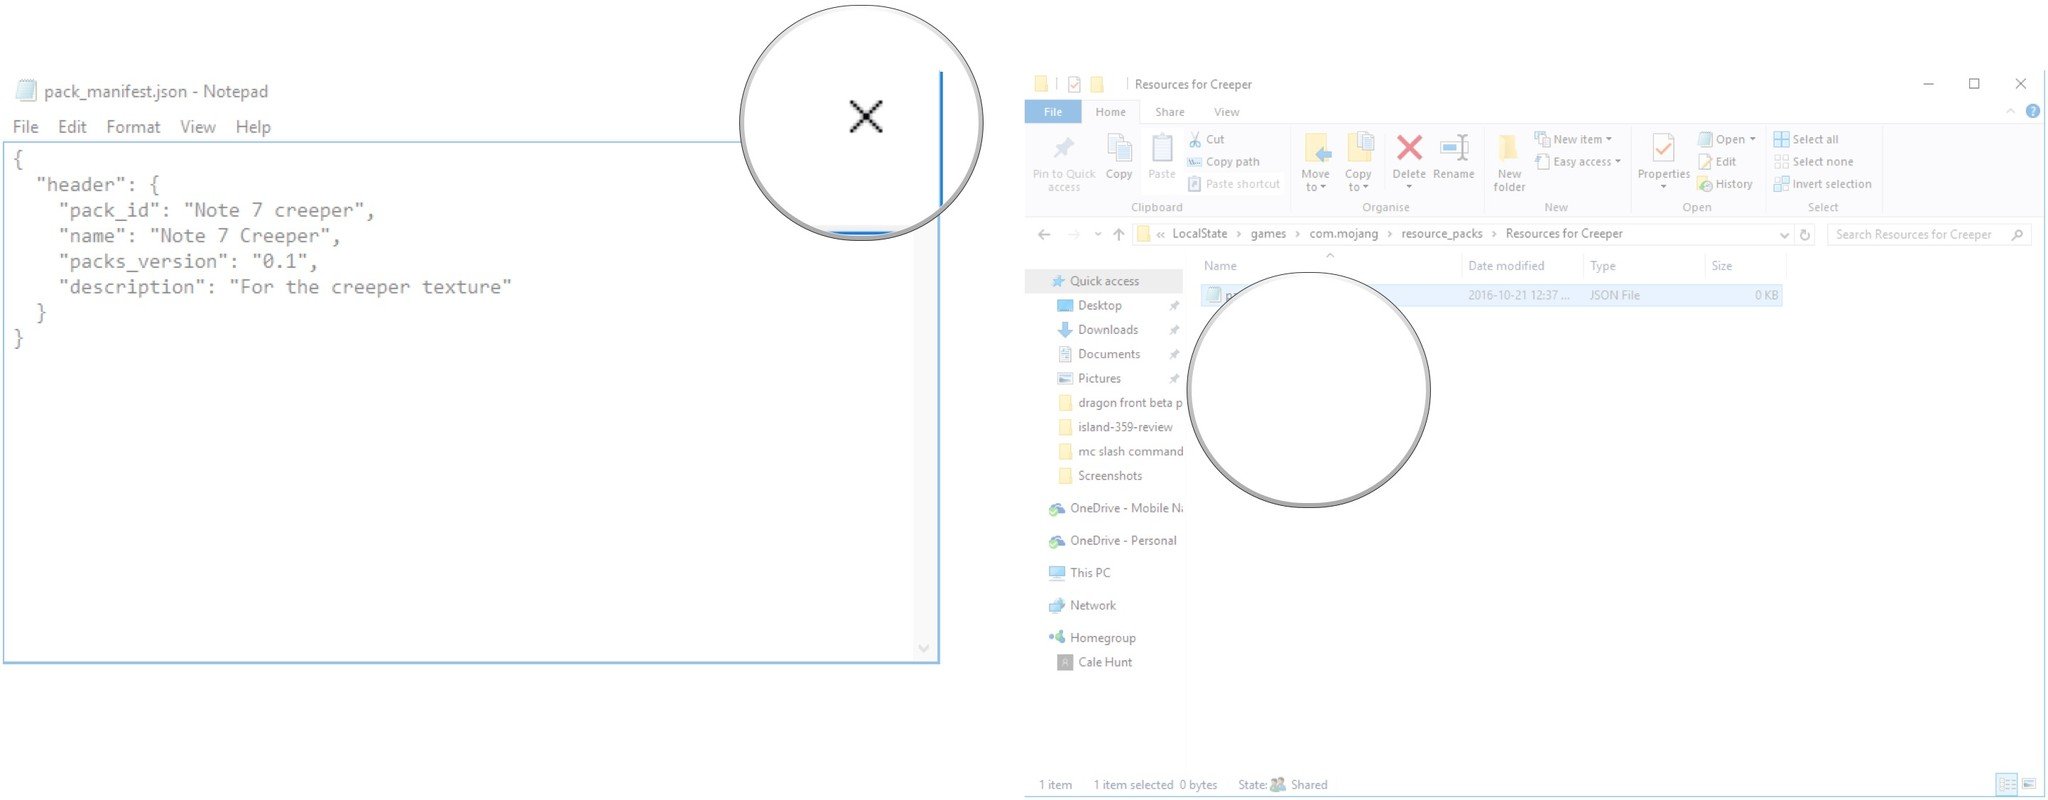
{ "header": { "pack_id": "Note-7-creeper", "name": "Note-7-creeper", "packs_version": "0.0.1", "description": "For the creeper texture" } }Ensure the spacing and line breaks are the same as the image below.
- Click File.
-
Click Save.

- Close the document.
-
Right-click a blank space in the window.
- Hover your cursor over New and click Folder.
-
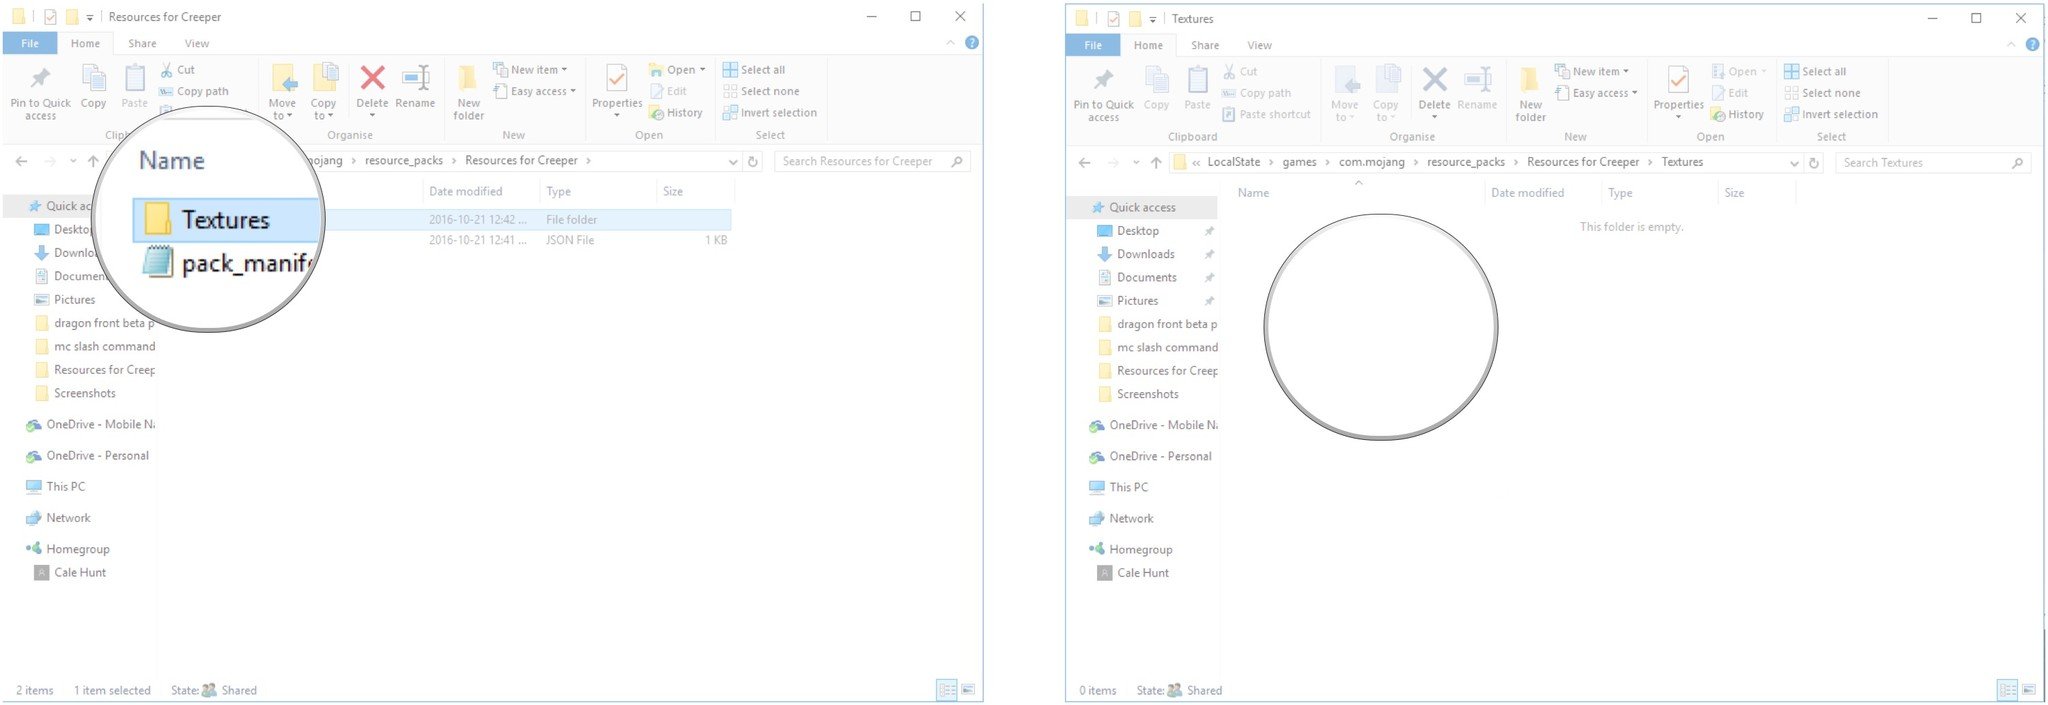
Type Textures and hit Enter on your keyboard.

- Double-click the Textures folder.
-
Right-click a blank space in the window.
- Hover your cursor over New and click Folder.
-
Type Entities and hit Enter on your keyboard.
- Double-click the Entities folder.
-
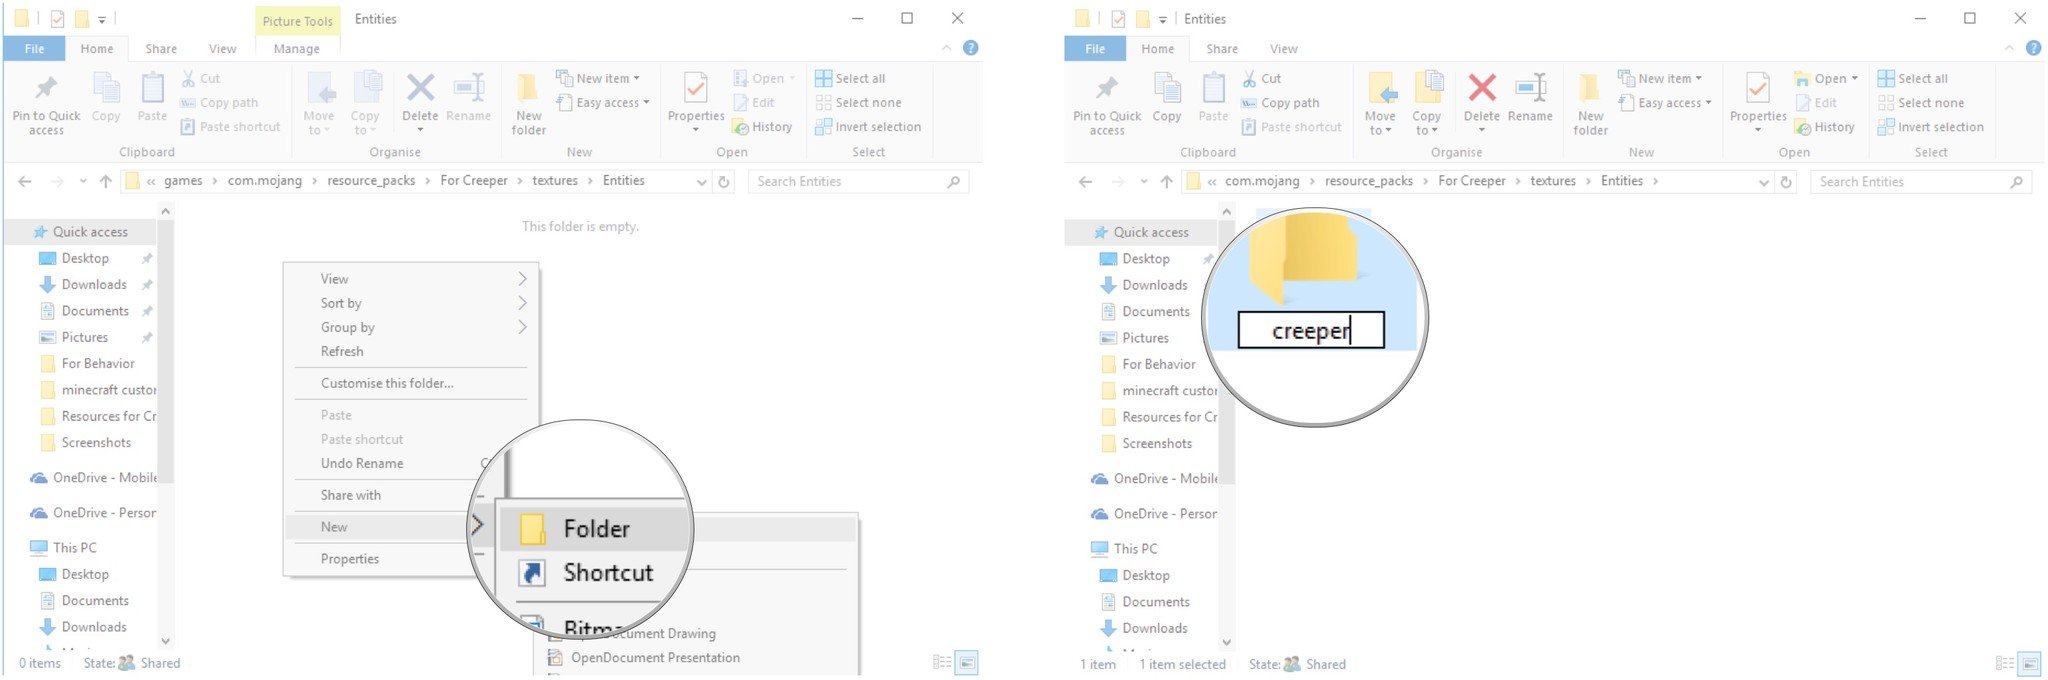
Right-click a blank space in the window.

- Hover your cursor over New and click Folder.
-
Type creeper and hit Enter on your keyboard. The name of this folder must correspond with whatever entity you made a skin for.
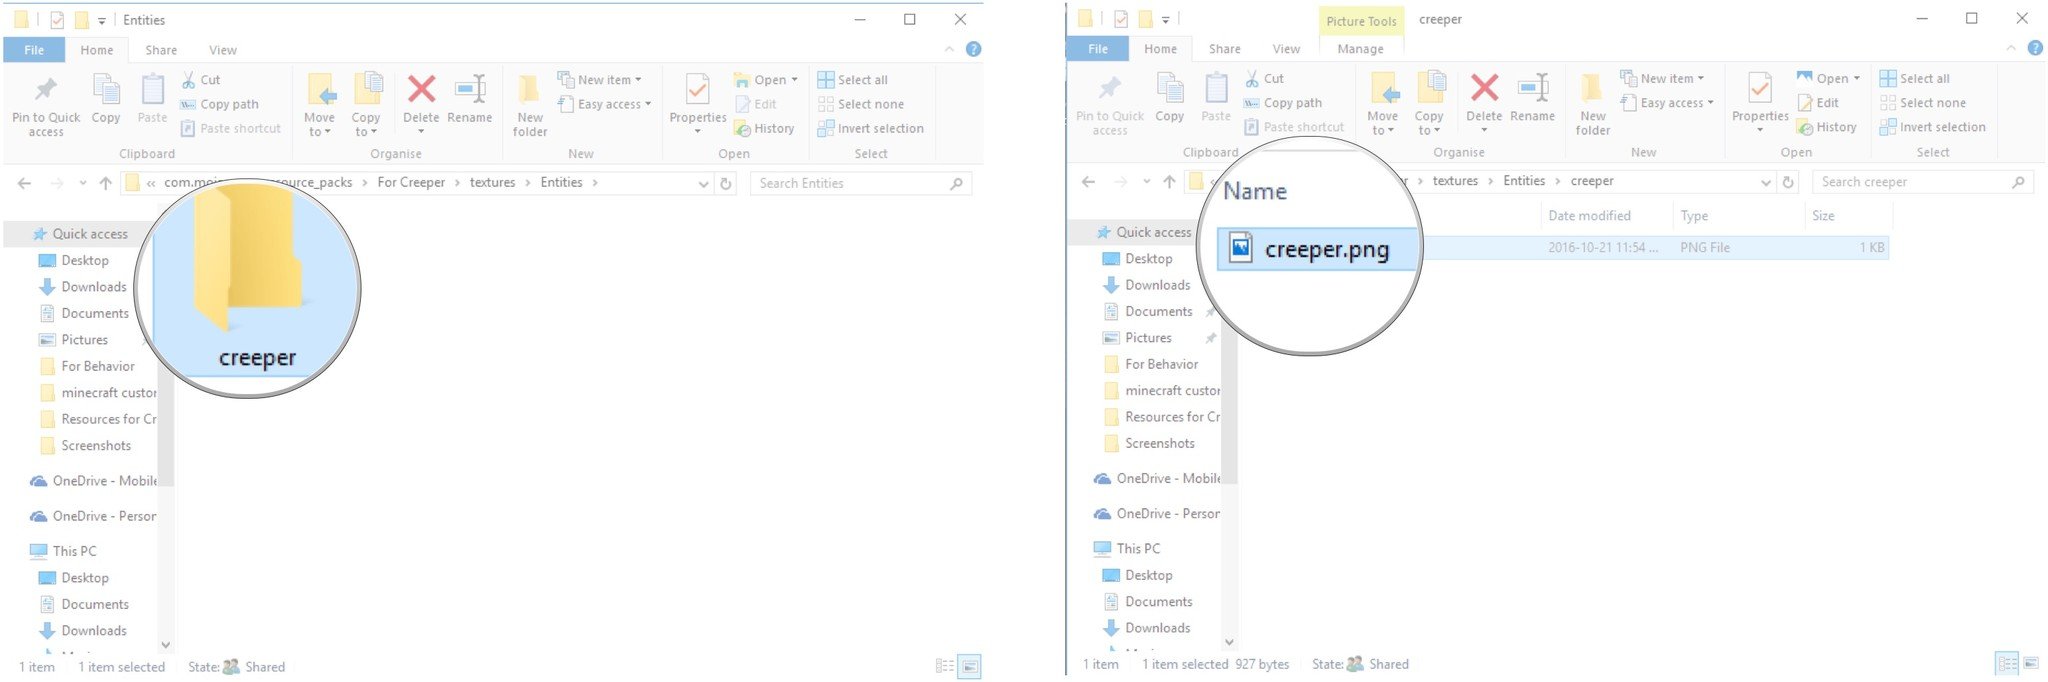
- Double-click the creeper folder.
-
Drag and drop the creeper.png file you made earlier into the window.


How to enable custom skins within Minecraft
It's now time to enable your custom skin within Minecraft.
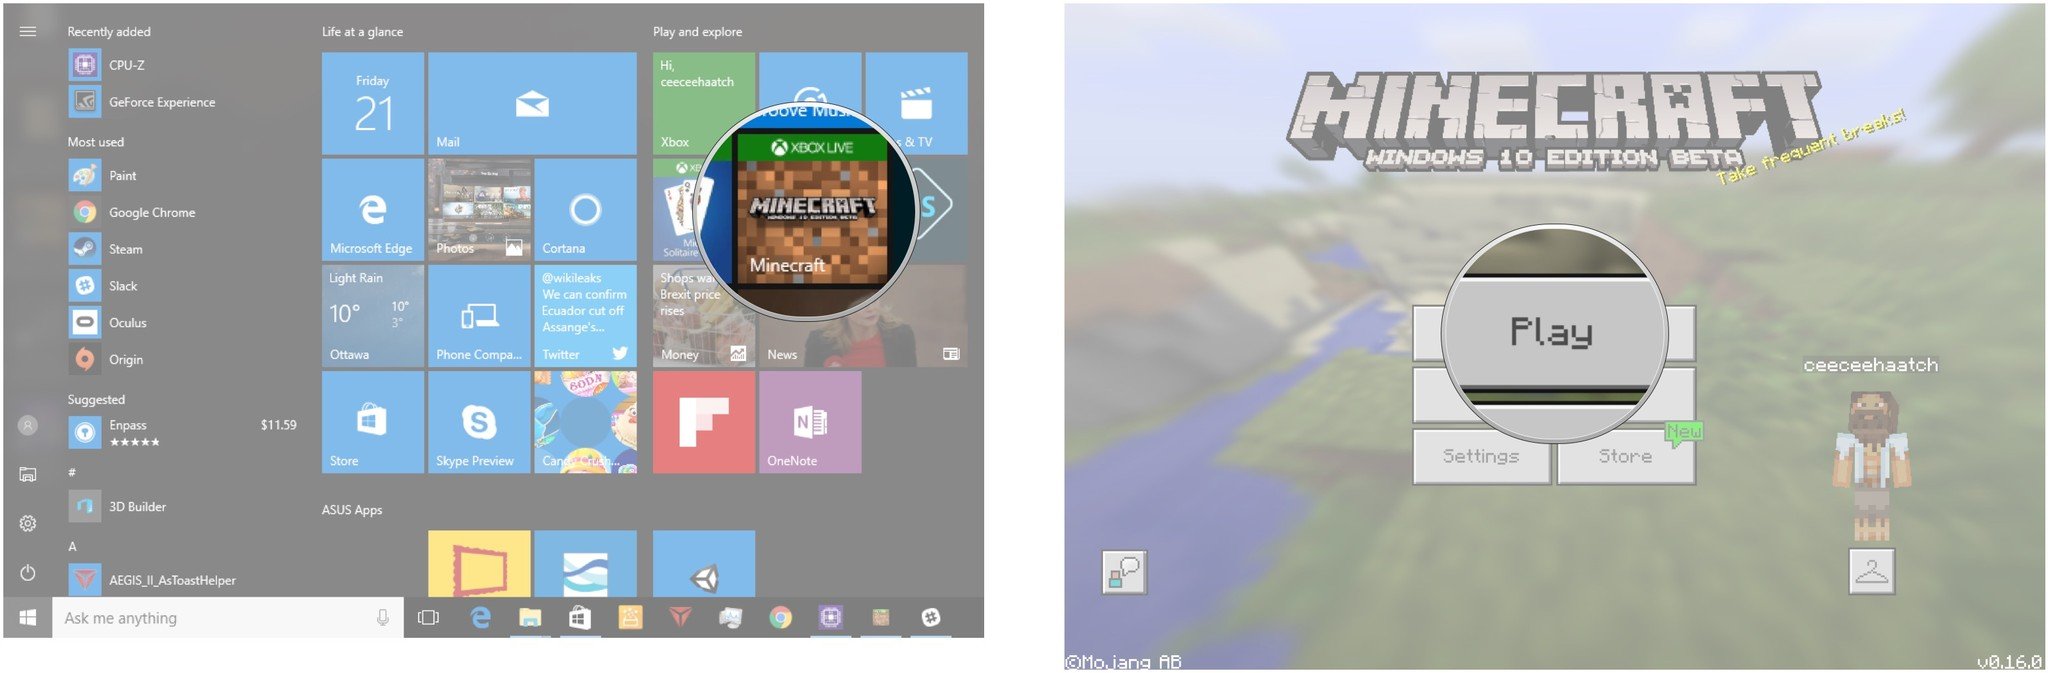
- Launch Minecraft: Windows 10 Edition from the Start menu, desktop, or taskbar.
-
Click Play
- Click the edit button next to an existing world. It looks like a pencil drawing two lines.
-
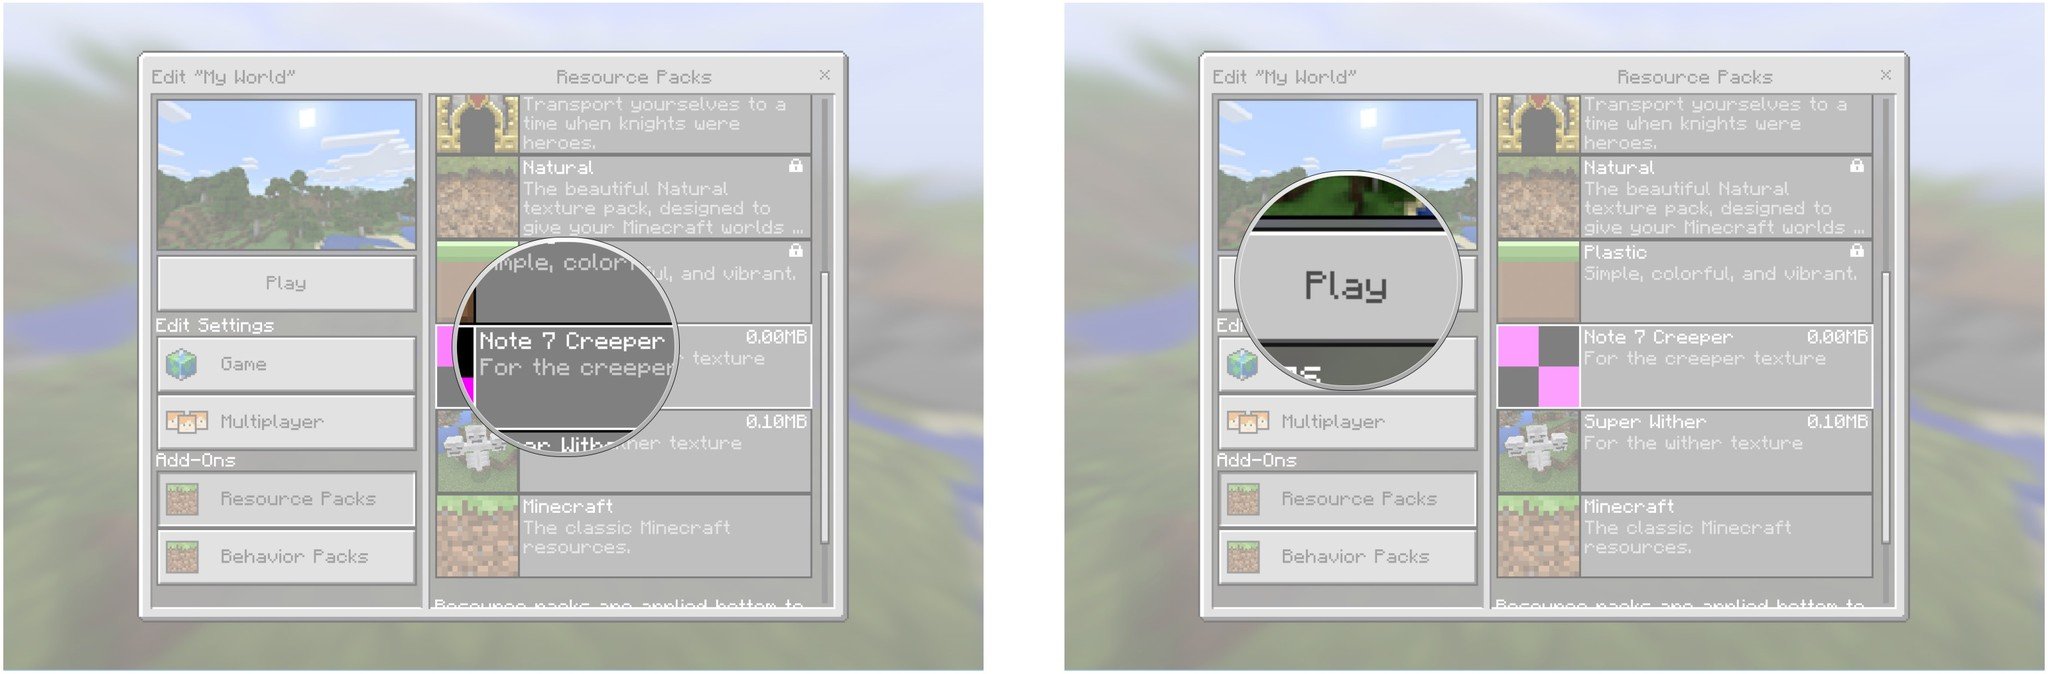
Click Resource Packs.

- Click the resource pack you just added. In this case we called it Note 7 Creeper.
-
Click Play.


The Result!
Minecraft's Boss Update + over 9000 hours in MS Paint = Galaxy Note 7 Creeper, lol. pic.twitter.com/AVN7pB2QhY
— Jez Corden (@JezCorden) October 22, 2016
Your mobs
Have you created skins for the mobs in your game? Let us know in the comments section below!
We may earn a commission for purchases using our links. Learn more.
How to Get Custom Skins on Minecraft Windows 10 Edition
Source: https://www.windowscentral.com/how-customize-mob-skin-minecraft-windows-10-edition
0 Response to "How to Get Custom Skins on Minecraft Windows 10 Edition"
Post a Comment